
I’ve been working on a simple hobby project. The goal is to build an Android application which, as it turns out, requires a backend. The most important task of the backend is to perform certain things at specified times in future.
In this post I will explain how I’ve designed a simple scheduler which relies on AppEngine cron, tasks and the datastore. We will make a new trivial AppEngine application that ties everything together. Although I normally prefer Python but I’ve chosen Java for this project. I guess that’s because I wanted some consistency with the Android counter-part that I’m also developing.
Why do we need scheduler in the first place?
To implement the app that I’m developing I must be able to send several notifications to selected users starting at a certain time within a specified interval. For example, send 5 notifications to user John with a 2 hour interval starting at 2pm. I believe such mechanism might be generally useful.
Scheduler design
My number one goal with the project I’m working on is simplicity. I want to make it work. I want to learn few things. I want to end up with fewest lines of code possible. Projects can easily get out of scope and become too much to manage, especially when done out of curiosity and not with a commercial intent. This means scheduler must be as simple as possible and rely on as few parts as possible.
I propose to chiefly rely on the built-in AppEngine cron. Define a cron job that is executed every minute. In that cron job execute scheduled tasks. Each scheduled task has a next_run_ts parameter that specifies when is the next occurrence due. Whenever the cron is run it checks for all tasks that either have next_run_ts equal to current time or are already in the past. For every due scheduled task the cron job creates a background task to execute actual instructions.
The down-side of my design is that the scheduler is only accurate within couple of minutes. This is perfectly acceptable for my use-case.
Create AppEngine project in Eclipse
First things first, let’s create a new AppEngine project to prototype our scheduler. I assume you have Eclipse installed and configured with Google plugin. If not, head over to a recent post I have written and read the section about setting up ADT. You don’t need ADT if you don’t intend to write Android application but since I already have ADT there’s no reason to mess with a separate Eclipse installation.
Create a new AppEngine project by clicking File > New > Other... > Google > Web Application Project. Choose any name you want (I’ve chosen Scheduler) and specify the package name (I’ve selected net.pisarenko.backend.scheduler). Untick Use Google Web Toolkit and Generate project sample code and press Finish.
Create a test class to generate scheduled tasks
In order to test our scheduler we must be able to create some tasks first. So our first goal is to create a handler which creates scheduled tasks. I’ve called my test class TestGenerator:
package net.pisarenko.backend.scheduler;

import java.io.IOException;
import java.util.logging.Logger;

import com.google.appengine.api.datastore.DatastoreService;
import com.google.appengine.api.datastore.DatastoreServiceFactory;
import com.google.appengine.api.datastore.Entity;
import com.google.appengine.api.datastore.Key;
import com.google.appengine.api.datastore.KeyFactory;

import javax.servlet.http.HttpServlet;
import javax.servlet.http.HttpServletRequest;
import javax.servlet.http.HttpServletResponse;

@SuppressWarnings("serial")
public class TestGenerator extends HttpServlet {
	private static final Logger log = Logger.getLogger(TestGenerator.class.getName());
	public static final String JOB_PARENT = "notification_job_parent";

	public void doGet(HttpServletRequest req, HttpServletResponse resp) throws IOException {
		// set parent to ensure data consistency
		Key jobKey = KeyFactory.createKey("NotificationJob", JOB_PARENT);
		Entity job = new Entity("NotificationJob", jobKey);
		DatastoreService datastore = DatastoreServiceFactory.getDatastoreService();

		job.setProperty("next_run_ts", System.currentTimeMillis() / 1000L + 10);
		job.setProperty("frequency", 10);
		job.setProperty("remaining", 5);

		datastore.put(job);

		log.severe("Created new job to run every 10 seconds 5 times");
	}
}
All the code does is it creates a new AppEngine data-store entity of kind NotificationJob when a HTTP GET request is made to this handler. Notice that I use UNIX timestamp as the specification when to run the task. I also take precautions to ensure that written data is consistent by setting a non-existent parent to the saved entity. If you’re not familiar with AppEngine’s data-store I highly recommend reading about eventual consistency as AppEngine data-store is very different from RDBMS and you must have the right mindset when designing storage for your system.
The intent of the test scheduled task is to execute 6 times within 10 second interval and start in 10 seconds from the moment the handler is called.
Notice that I’m using 10 second interval. As you remember, AppEngine cron executes once a minute. This means that the resolution of the cron is not sufficient for running our test task. AppEngine would likely execute all 6 occurrences at the same time. However, we will be using the development server and cron jobs are not executed automatically. We will be acting as a cron ourselves. I will manually access the test handler more often than every 10 seconds for testing purposes.
Let’s register our handler at /test by modifying the web.xml file under war/WEB-INF/ in the project structure:
...

	<servlet>
		<servlet-name>test</servlet-name>
		<servlet-class>net.pisarenko.backend.scheduler.TestGenerator</servlet-class>
	</servlet>

	<servlet-mapping>
		<servlet-name>test</servlet-name>
		<url-pattern>/test</url-pattern>
	</servlet-mapping>

...
For testing/development/debugging purposes I’ve put a log statement. Let’s try our generator. Run the project by pressing Ctrl+F11. By default, the development server starts at http://127.0.0.1:8888 so our handler is accessible at http://127.0.0.1:8888/test.
Access the test handler and check the output of console in Eclipse. You should see something like this:
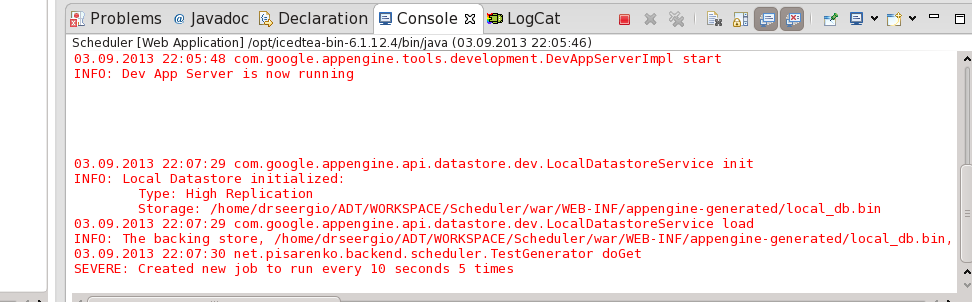
Our test scheduled task has been saved! Now let’s finish this off with the actual task handler.
Configure cron and the scheduled task handler
To run our scheduler loop every minute using AppEngine’s cron we must create a cron.xml config file in war/WEB-INF:
<?xml version="1.0" encoding="UTF-8"?>
<cronentries>
  <cron>
    <url>/cron</url>
    <description>Send pending notifications</description>
    <schedule>every 1 minute</schedule>
  </cron>
</cronentries>
Effectively, this will execute /cron endpoint every minute. Note that development server will not run cron so we will manually trigger it through the browser by accessing http://127.0.0.1:8888/cron.
Now let’s write the code behind the /cron endpoint. The code will check current time, retrieve all scheduled tasks which have next run either in the past or right now and execute them. If the task is supposed to be run several times we will reduce the remaining run counter, calculate the next execution time and save the changes. If the task has no more runs we delete the entity from the data-store:
package net.pisarenko.backend.scheduler;

import java.io.IOException;
import java.util.logging.Logger;

import javax.servlet.http.HttpServlet;
import javax.servlet.http.HttpServletRequest;
import javax.servlet.http.HttpServletResponse;

import com.google.appengine.api.datastore.DatastoreService;
import com.google.appengine.api.datastore.DatastoreServiceFactory;
import com.google.appengine.api.datastore.Entity;
import com.google.appengine.api.datastore.Key;
import com.google.appengine.api.datastore.KeyFactory;
import com.google.appengine.api.datastore.PreparedQuery;
import com.google.appengine.api.datastore.Query;
import com.google.appengine.api.datastore.Query.FilterPredicate;
import com.google.appengine.api.datastore.Query.FilterOperator;

import com.google.appengine.api.taskqueue.Queue;
import com.google.appengine.api.taskqueue.QueueFactory;
import static com.google.appengine.api.taskqueue.TaskOptions.Builder.*;


@SuppressWarnings("serial")
public class NotificationScheduler extends HttpServlet {
    private static final Logger log = Logger.getLogger(NotificationScheduler.class
            .getName());

    public void doGet(HttpServletRequest req, HttpServletResponse resp)
            throws IOException {
        log.severe("Running cron loop");
        long currentTime = System.currentTimeMillis() / 1000L;
        log.severe("Current time: " + currentTime);

        DatastoreService datastore = DatastoreServiceFactory
                .getDatastoreService();
        Key jobKey = KeyFactory.createKey("NotificationJob",
                TestGenerator.JOB_PARENT);
        Query query = new Query("NotificationJob", jobKey)
                .setAncestor(jobKey)
                .setFilter(
                        new FilterPredicate("next_run_ts",
                                FilterOperator.LESS_THAN_OR_EQUAL, currentTime));
        PreparedQuery pq = datastore.prepare(query);

        for (Entity job : pq.asIterable()) {
            processJob(job);
        }
    }

    private void processJob(Entity job) {
        Queue queue = QueueFactory.getDefaultQueue();
        queue.add(withUrl("/sender").param("job_id", "job_id"));

        DatastoreService datastore = DatastoreServiceFactory
                .getDatastoreService();
		job.setProperty("remaining", ((Long) job.getProperty("remaining")) - 1);

		if ((Long)job.getProperty("remaining") == 0) {
		    datastore.delete(job.getKey());
		} else {
		    job.setProperty("next_run_ts",
		        ((Long)job.getProperty("next_run_ts")) + ((Long)job.getProperty("frequency")));
			datastore.put(job);
		}
	}
}
The handler executes a query against the data-store to retrieve due scheduled tasks. Note that it uses ancestor query to ensure that return values are consistent. Then we iterate through retrieved scheduled tasks and execute processJob method. The processJob introduces AppEngine default queue which we use for executing our scheduled tasks in the background.
Update web.xml for the new handler:
...

	<servlet>
		<servlet-name>cron</servlet-name>
		<servlet-class>net.pisarenko.backend.scheduler.NotificationScheduler</servlet-class>
	</servlet>

	<servlet-mapping>
		<servlet-name>cron</servlet-name>
		<url-pattern>/cron</url-pattern>
	</servlet-mapping>

...
At this point the code won’t work because the processJob method is creating queue tasks (not to confuse with our custom scheduled tasks) to be run in the background. Let’s fix that!
Use the default AppEngine queue for executing scheduled tasks
AppEngine provides functionality to execute code in the background. The easiest way is to use the default push queue. Basically, you tell the default push queue what endpoint should handle the task and AppEngine will execute that endpoint in background. You can also provide parameters that will be populated as HTTP request parameters. No additional configuration is needed, simply instantiate the queue as in our test code.
In the code above we call endpoint /sender with parameter job_id whose value is always job_id. Obviously, this is not a very useful parameter as it stands. However, in future I will change this parameter to provide enough information to the background task handler to carry out execution of the task. For example, the parameter could provide a key to an entity that contains users which should be notified.
The code for the /sender handler:
package net.pisarenko.backend.scheduler;

import java.io.IOException;
import java.util.logging.Logger;

import javax.servlet.http.HttpServlet;
import javax.servlet.http.HttpServletRequest;
import javax.servlet.http.HttpServletResponse;

@SuppressWarnings("serial")
public class NotificationSender extends HttpServlet {
    private static final Logger log = Logger.getLogger(NotificationSender.class.getName());

    public void doPost(HttpServletRequest req, HttpServletResponse resp) throws IOException {
        log.severe("EXECUTING TASK FROM QUEUE " + req.getParameter("job_id"));
    }
}
As you see, it does not do much but it provides the almighty log statement which we will use to confirm that our code is working as we want it to. Finally, update web.xml with /sender:
...

    <servlet>
        <servlet-name>sender</servlet-name>
        <servlet-class>net.pisarenko.backend.scheduler.NotificationSender</servlet-class>
    </servlet>

    <servlet-mapping>
        <servlet-name>sender</servlet-name>
        <url-pattern>/sender</url-pattern>
    </servlet-mapping>

...
Final run
Run the application from Eclipse and open your browser. First, access http://127.0.0.1:8888/cron and observe that EXECUTING TASK FROM QUEUE job_id is displayed in console output. By accessing /cron you’re acting as a manual cron. Remember when we ran /test? Exactly, this is why our cron handler is now executing those long due tasks! Refresh the page several times to make sure that all 6 occurrences are run.
Then, run /test to create another test scheduled task and quickly access /cron handler again. If you refresh the browser window often enough you will observe that the scheduled task is executed only when 10 seconds have elapsed since the last execution. Sweet, our scheduler is working!
As a next step, experiment with the test generator and try the code in production AppEngine. As for myself, I’m going to integrate this piece into the project I’m working on. I prefer to build applications by prototyping separate pieces one at a time. This way I at least have an idea of what to expect from each comopnent and know how to integrate it into the bigger design.